The crucial design details on Aston Martin's 2022 F1 car — and the bits it's hiding
Aston Martin's AMR22 under the microscope: aerodynamicist Kyle Forster analysis the design details we can see, and the bits that are missing on the 2022 F1 car

Kyle Forster worked as an aerodynamicist at Mercedes-AMG F1 from 2018-2020 and runs the JKF racing engineering consultancy.
James Bond might not have dropped in to Aston Martin’s car launch as he did last year, but the AMR22 brings more than an enough intrigue, innovation and, potentially some deliberate distraction.
Although the usual caveats apply about the design evolving ahead of the first race, we are clearly looking at Aston’s 2022 car, which was seen at the launch event and in a series of digitally rendered images – which include some important differences.
It has also now run at a Silverstone shakedown: the first 2022 Formula 1 car that we have seen on track.
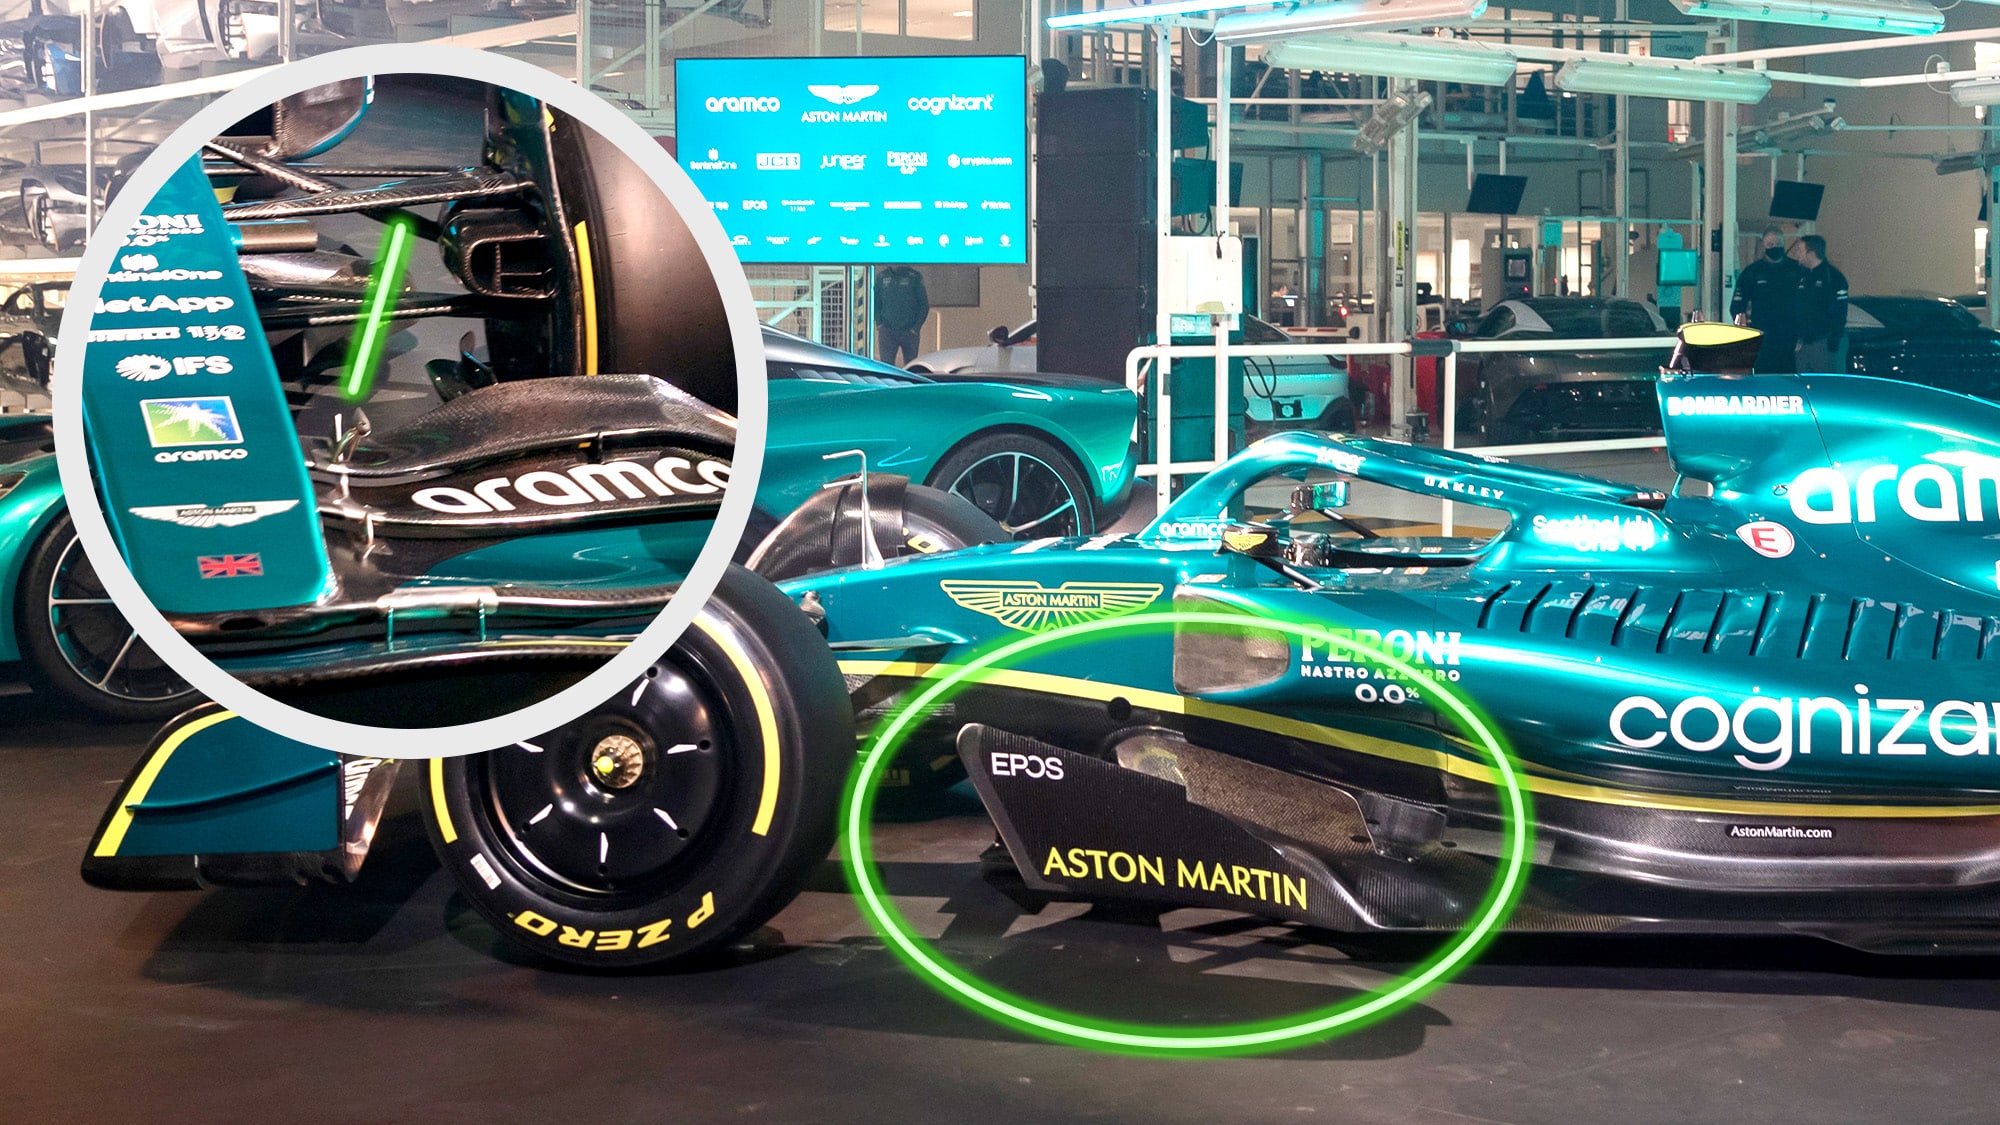
There is plenty to look at, so we’ll start at the front wing, where the first element is disconnected from the nose, similarly to Haas. It links to the nose in a very different way though, blending in at a much flatter angle and higher above the ground.
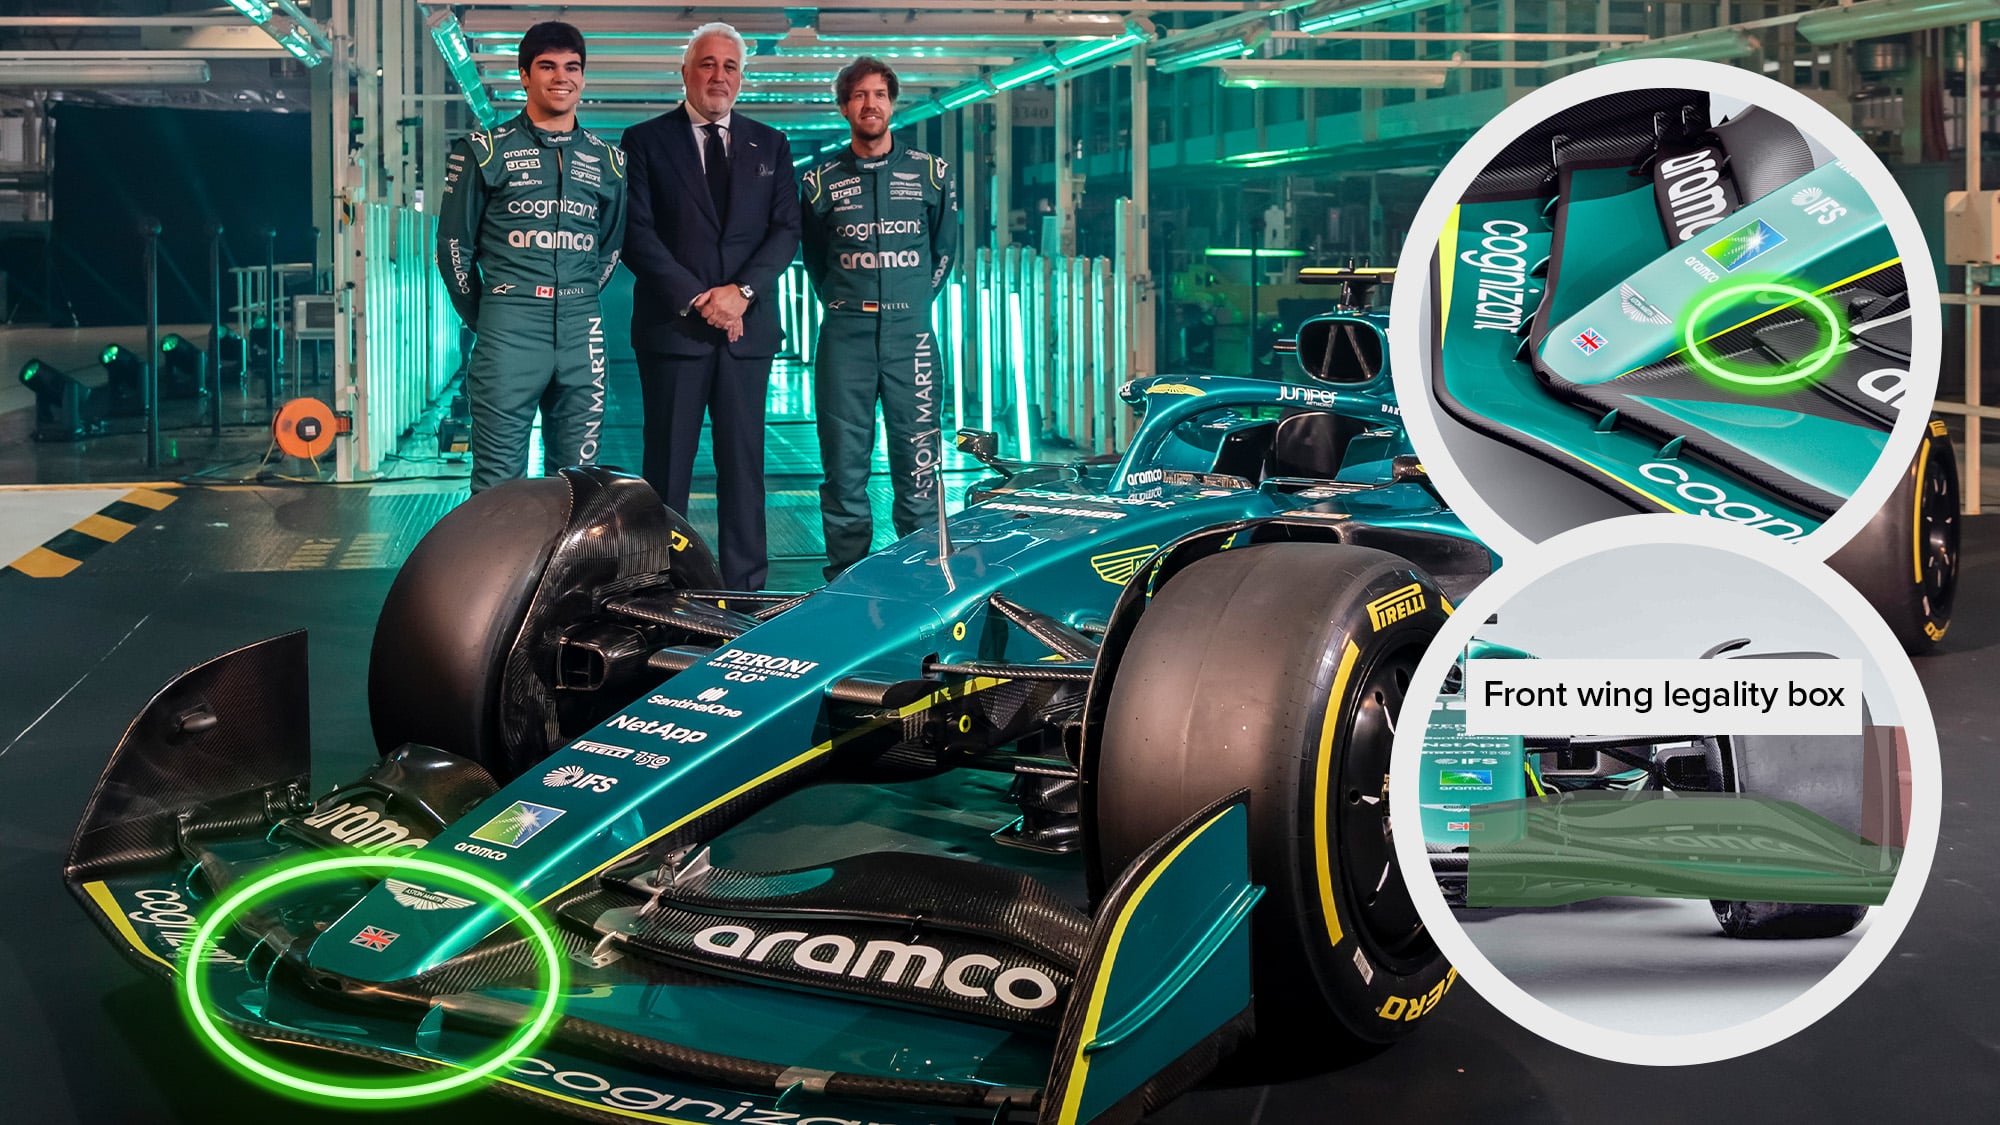
This is mainly driven by a very different front wing loading philosophy, offloading the centre and generating the majority of downforce elsewhere by loading the mid and outboard portions of the wing.
It allows the team to raise the centre of the wing well clear of the minimum legal ground clearance, which should get some lovely clean mass flow onto the T-tray/bib, that hangs underneath the cockpit, just ahead of the floor. This will maximise suction on the bib, and ensure good airflow towards the inlets of the floor channels.
The compromise is that they have to heavily load the further outboard portions of the wing to get back the load that they aren’t getting from the centre, running them to the maximum legal width barring the very outboard tip. The downside to this is lots of upward airflow to the outside of the tyre, which usually performs better with less of this upwash.
The nose follows the contour of the second element such that the trailing edge of the second element lines up with the underside of the nose. This will produce a very nice and clean surface underneath, and effectively mimics the element carrying cleanly the whole way across. It also means we don’t need to put any notches and sharp curvature in the front wing like the Haas to support flow around the nose.
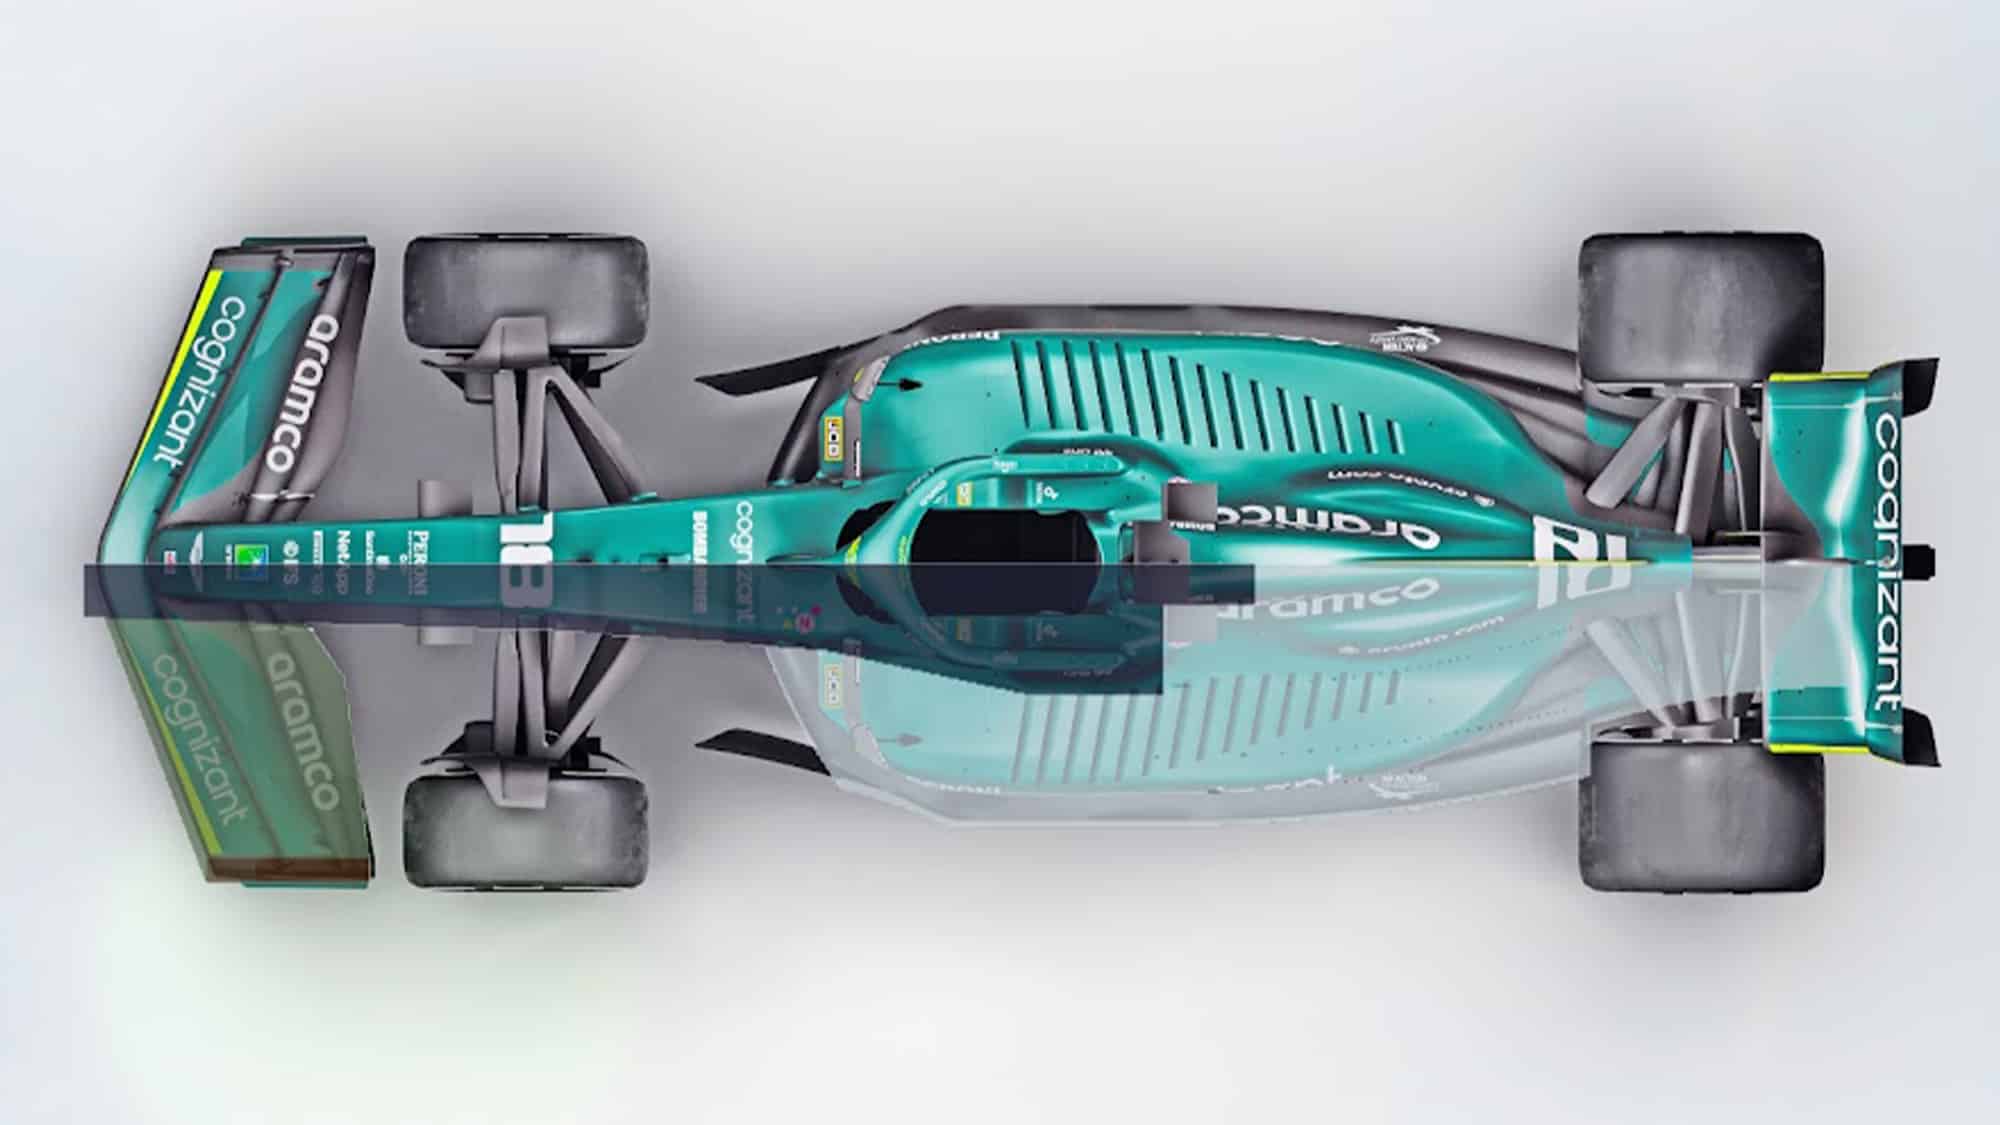
Looking at a legality box overlay from the top, which outlines the maximum allowable dimensions of the section, you can see that Aston is using essentially all the available space.
The first two elements of the wing are the largest, with much shorter rear elements particularly in the outboard section. Some of this may be structural, as the second element is likely to be carrying the majority of the load, but they could have found that this arrangement promotes higher quality airflow to the rear as well.
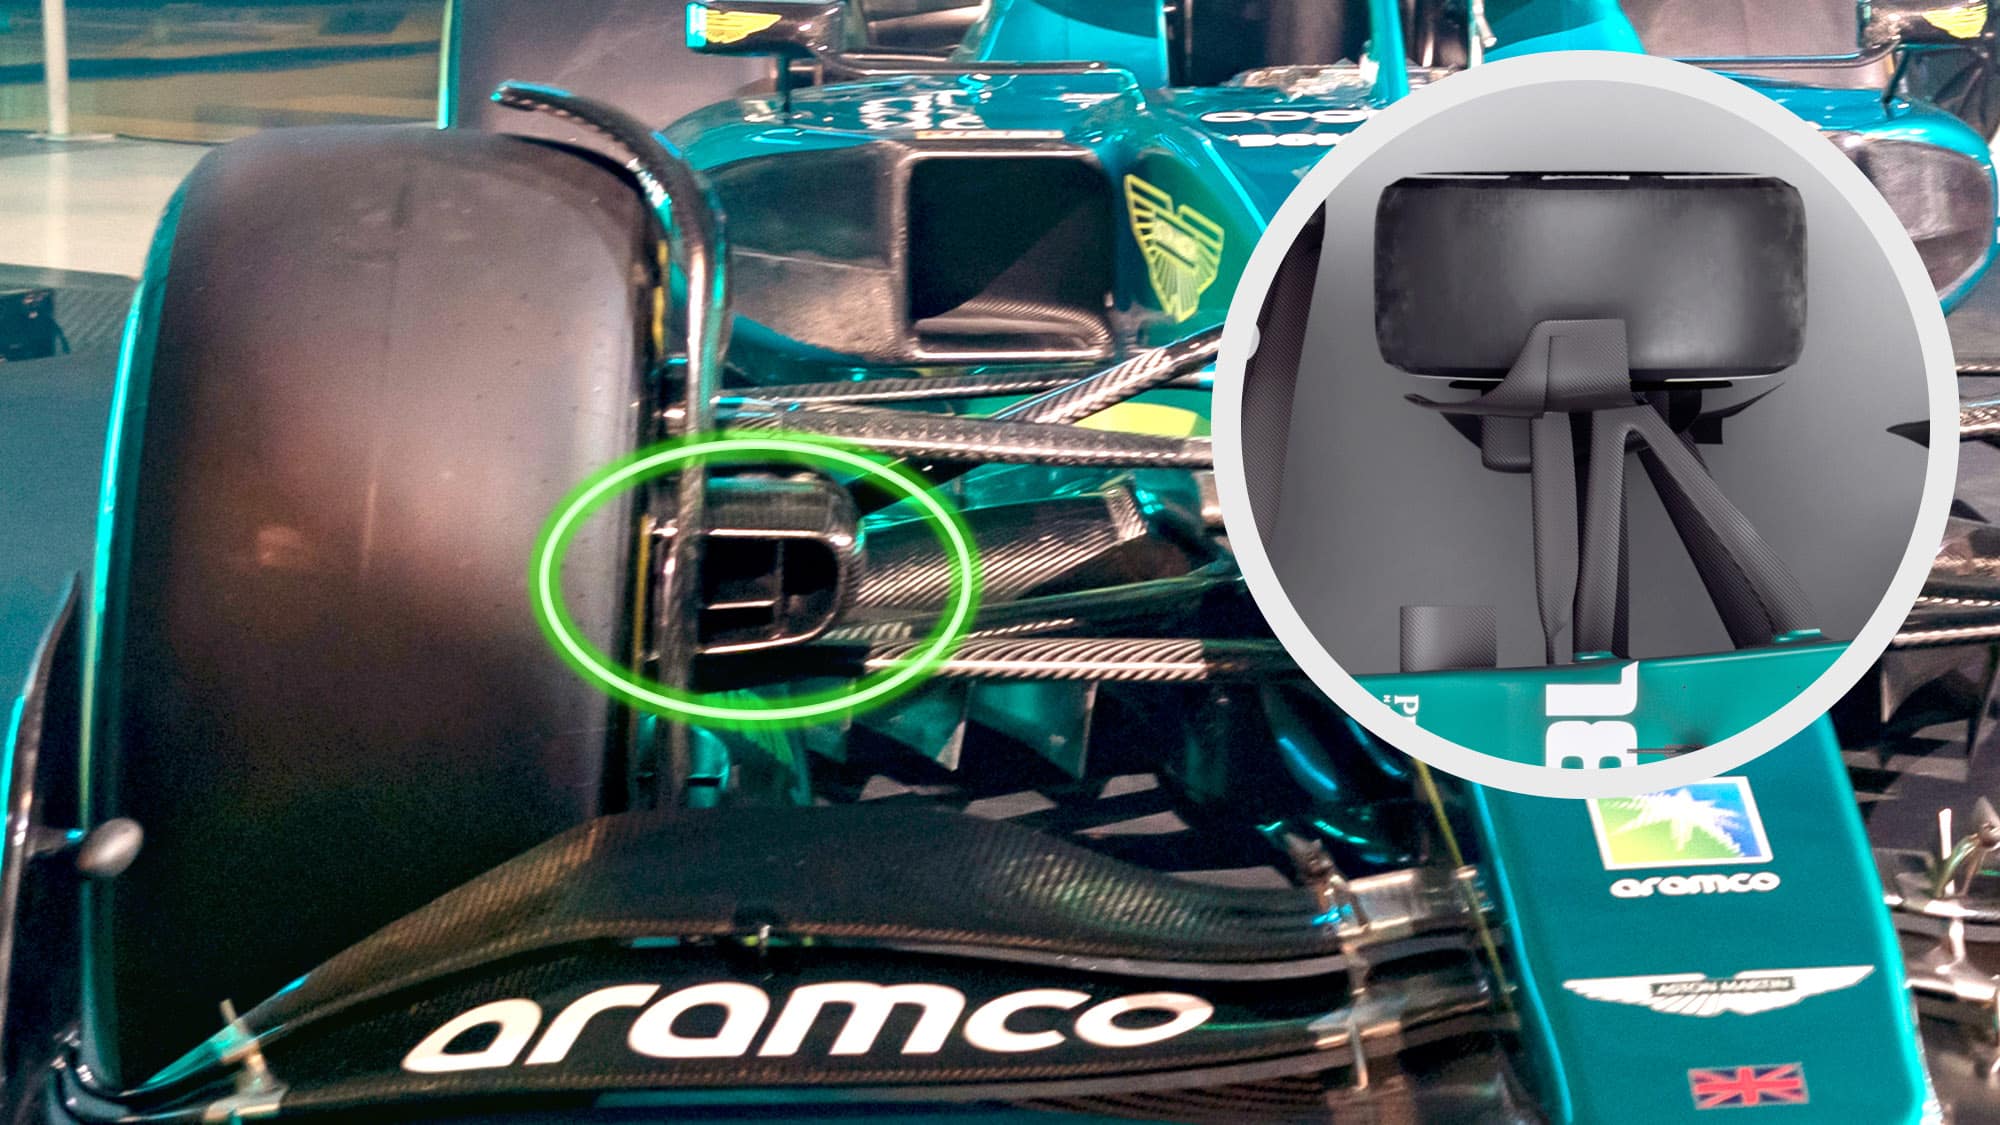
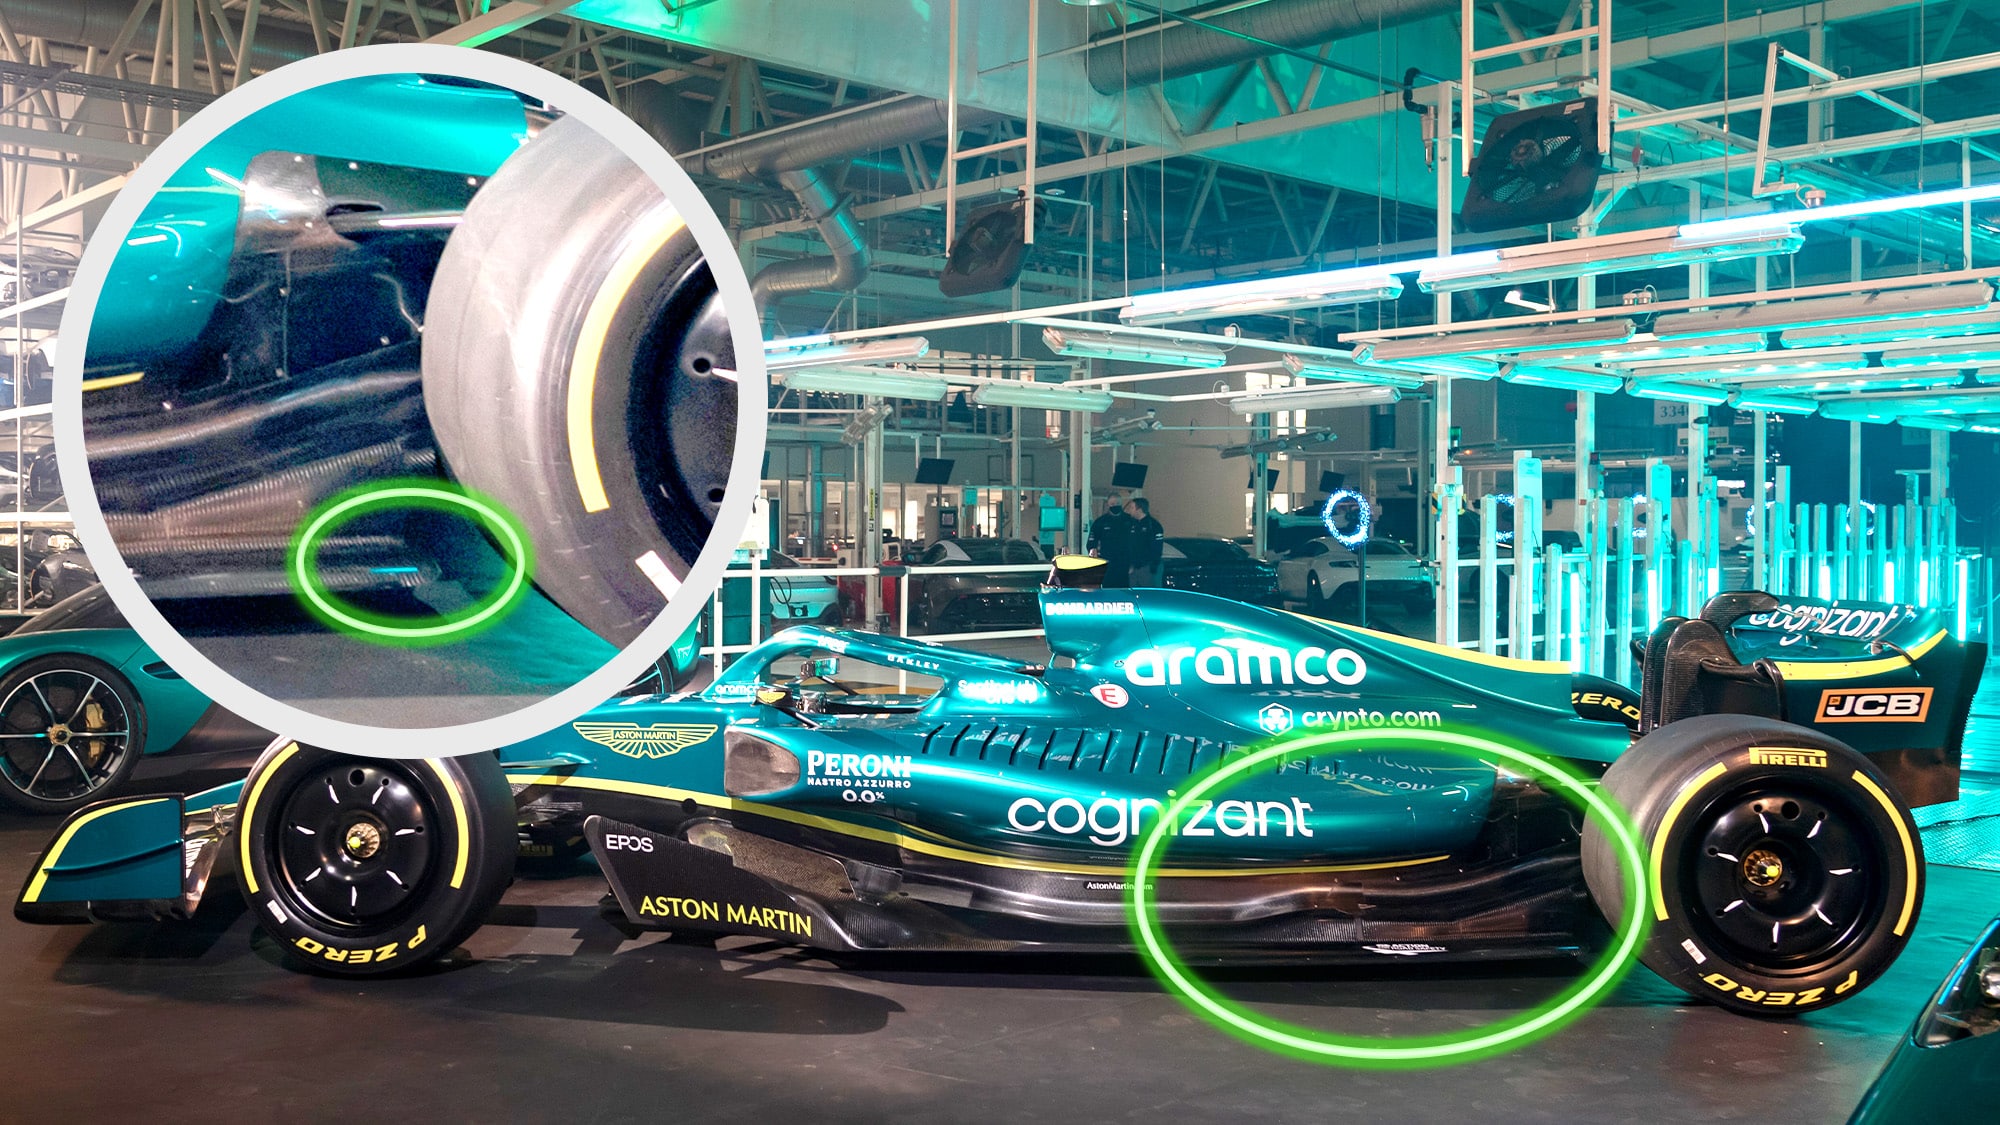
The Aston has significantly larger brake ducts than the Haas. It’s difficult to tell without seeing the brake duct exit, but they could be bypassing some air through and out the back to control the tyre wake in some manner.
The downwash and outwash created by the last two elements in the corner of the wing is quite significant. Haas is doing a similar thing, and teams were doing this heavily in previous years too.
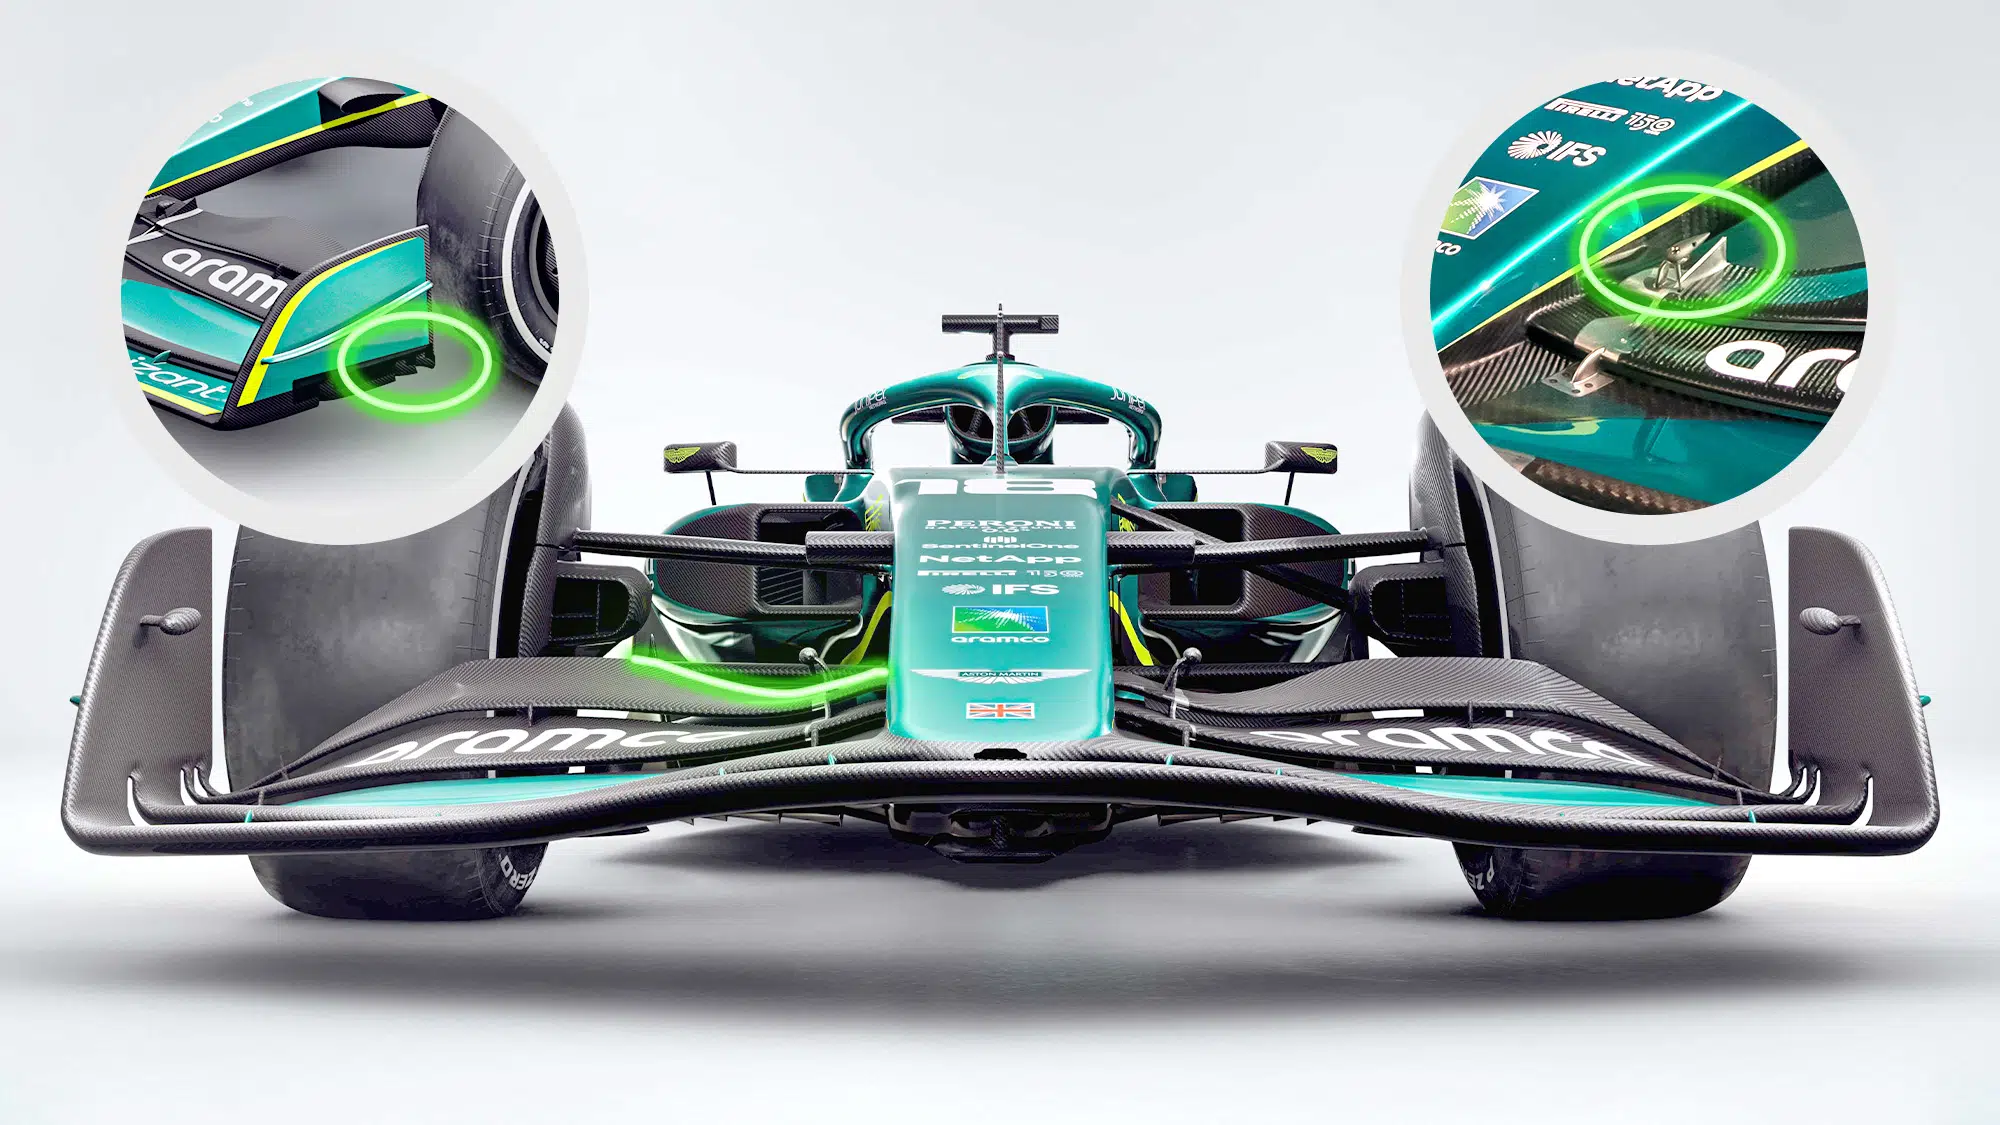
There’s a notable divot near the flap adjuster where the wing moves away from the edges of the legality box. Some of this is probably to offload the inboard portion of the wing, but I would imagine they are also spooling up some decent sheet vorticity here, which rolls up into a swirling vortex and can be used for flow management further downstream.
The flap adjustment pivot also has a very aggressive delta-shaped vortex shedding edge, which could be an ambitious interpretation of the rules. This would work well to generate discrete vortices for airflow management, and it seems like this is an area where teams are trying to do that.
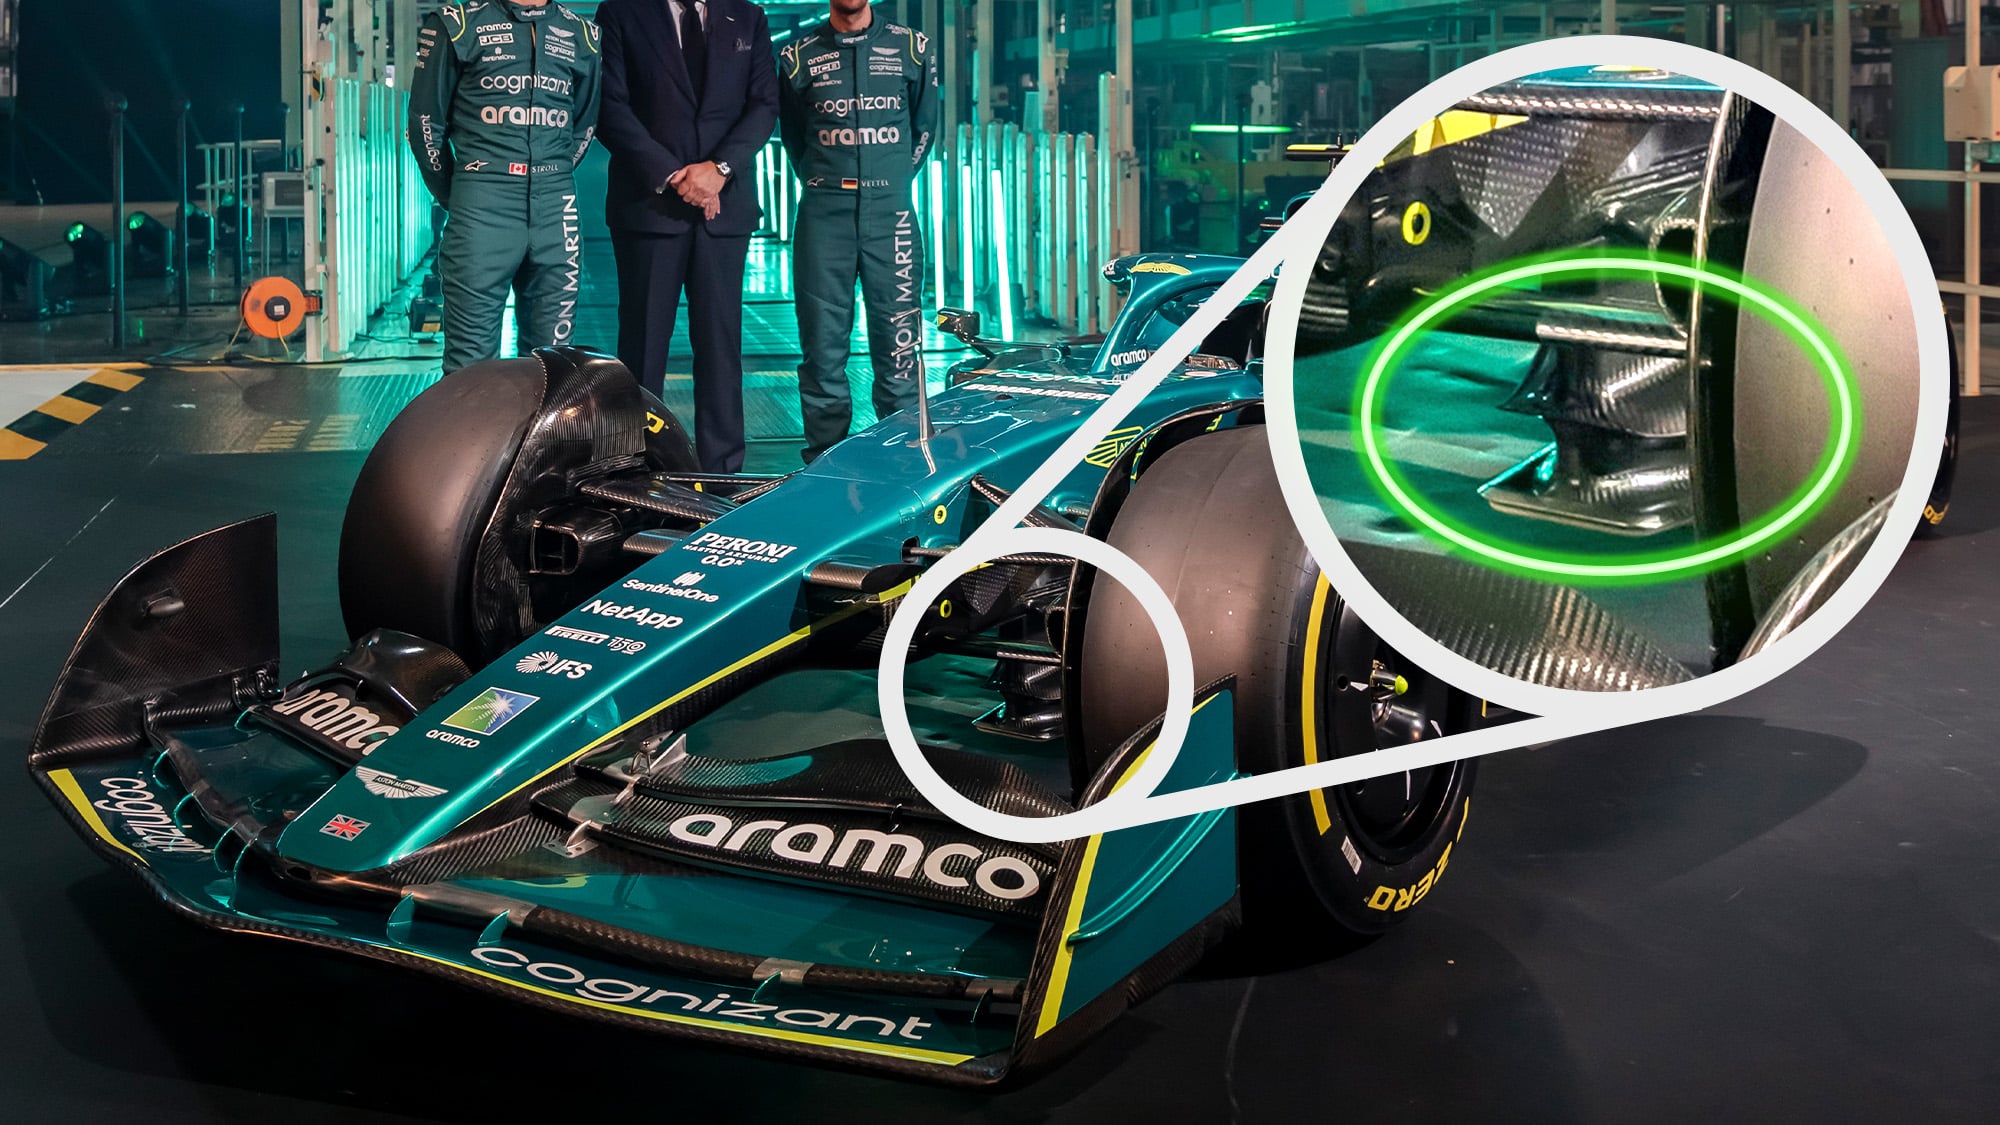
The hidden double T-tray is an interesting interpretation of the rules (might be pretty borderline), and something it looks like they’ve tried to hide in most camera shots. The intent is likely to shed additional vorticity into the tunnels in the floor, with the most likely intent being to increase suction and loading in the tunnels.
It may have potential to either power up the vortices on the lower bib and T-tray by pushing air onto the surface, or clean up the T-tray vortices and separate and discretise them more by directing airflow upwards.
The rules in this area allow for a continuous section, which is visible from either the top or the bottom for both the bib and the floor. The bib is allowed a minimum 15mm radius, the floor minimum 25mm. However they are allowed to be joined with a fillet of less than 50mm.
My suspicion is that they have created a geometry that uses the fillet to form this junction in such a way that you get a second T-tray. I couldn’t pull off the geometry with a quick look, but they have a lot more effort going into it.

The sidepod inlet is much further forward than the Haas, with the sidepod front rammed out into the angled legality box all along the black painted section. This has caused it to be flattened, as the aerodynamicists have used every inch of legality there to maximise the outwash and pressure they can get in that region to assist with kicking the tyre wake outboards.
They haven’t gone for the full-width Haas balloon sidepods further downstream though: perhaps they were trying to avoid the tyre wake latching on to the bodywork.
Another reason could be they didn’t want to induce inwash and airflow losses from the outer sidepod caused from the bodywork sweeping back in like the Haas has to.
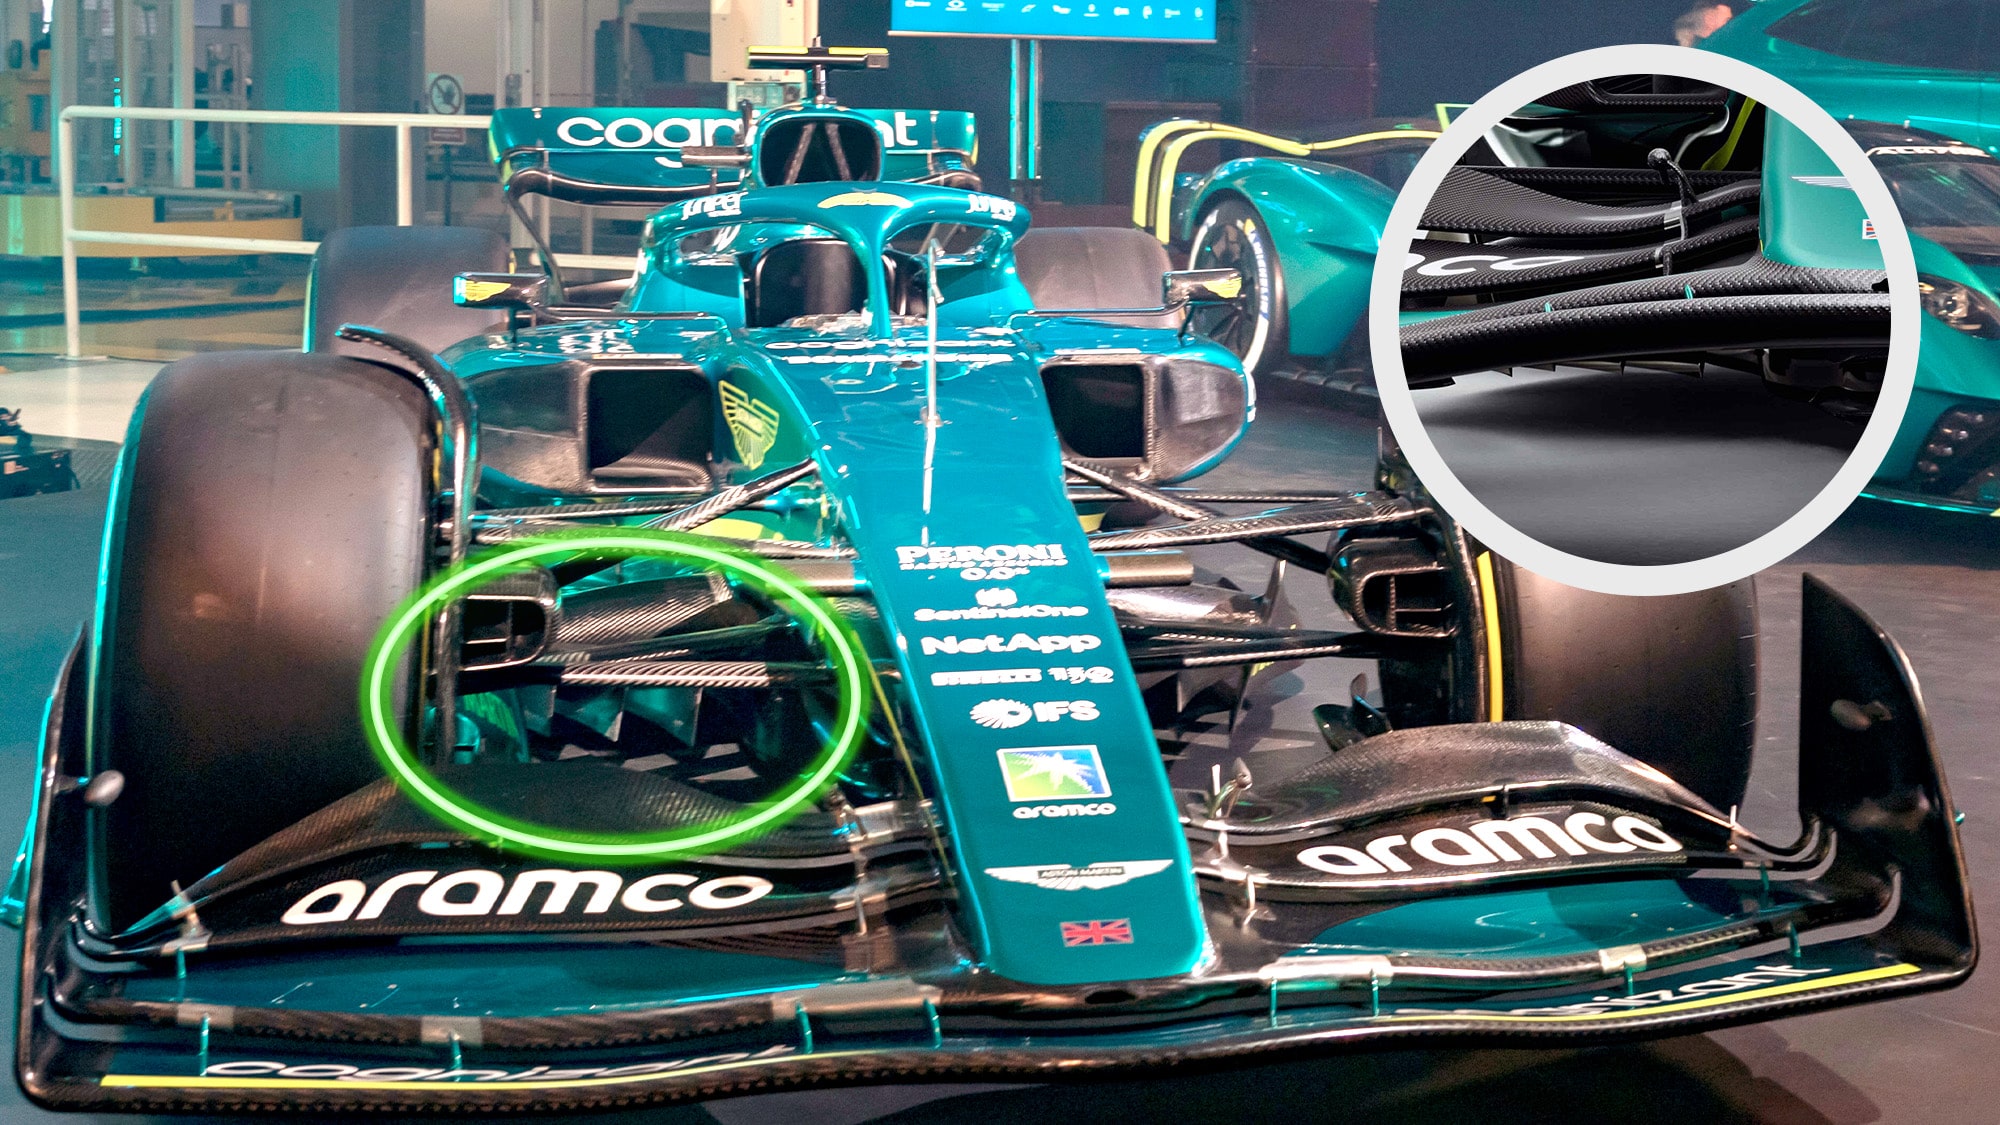
It looks like Aston has gone down the route of four side-by-side strakes. Unlike those on the Haas, they appear to be fully covered by the floor when viewed from top down. There’s not much we can speculate on here in terms of what they are doing to the flow.
The outermost strake is huge, likely at legality, and heavily canted. It’s essentially trying to mimic the bargeboard in function.
The cant (tucked in bottom, leaning out at the top) is likely a function of two things. One is wake shape, it could be an indication that they are trying to fight issues with lower wake ingress, as dirty air from the front wheels gets pulled towards the bodywork, potentially not helped by their heavily mid-outboard loaded wing.
The other is flow direction: the flow above the floor is high pressure and outwashing, the flow below is low pressure and inwashing. The cant may also generate a small amount of upwash and local downforce from the high pressure air ahead of the floor pushing sideways on it and being directed upwards.
Teams aren’t allowed to have rapid changes in angle and shape per the rules, so this may be a good compromise for maximising the performance of this device, and not stealing too much high pressure off the top of the floor as they don’t have the same mega sidepods as the Haas to generate pressure above the floor leading edge.
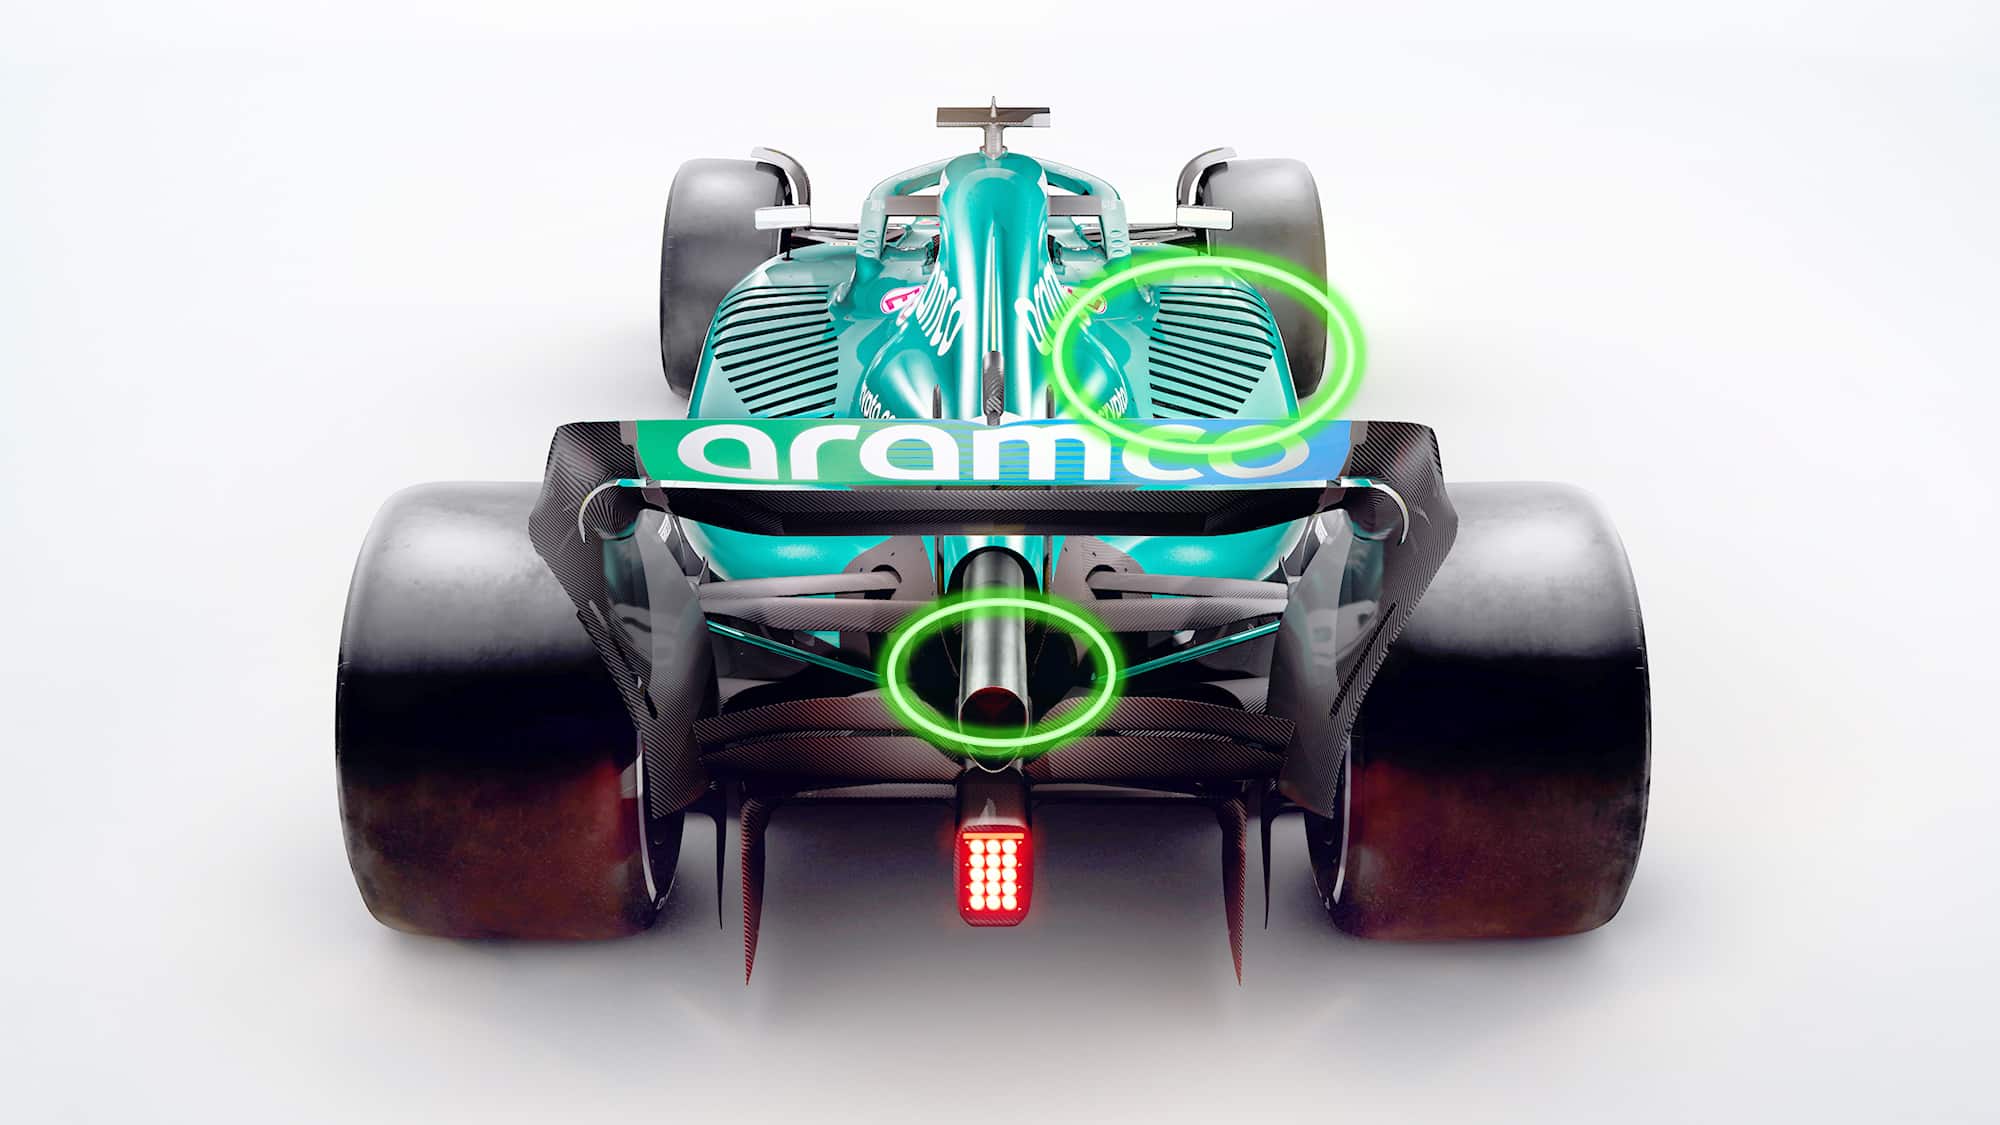
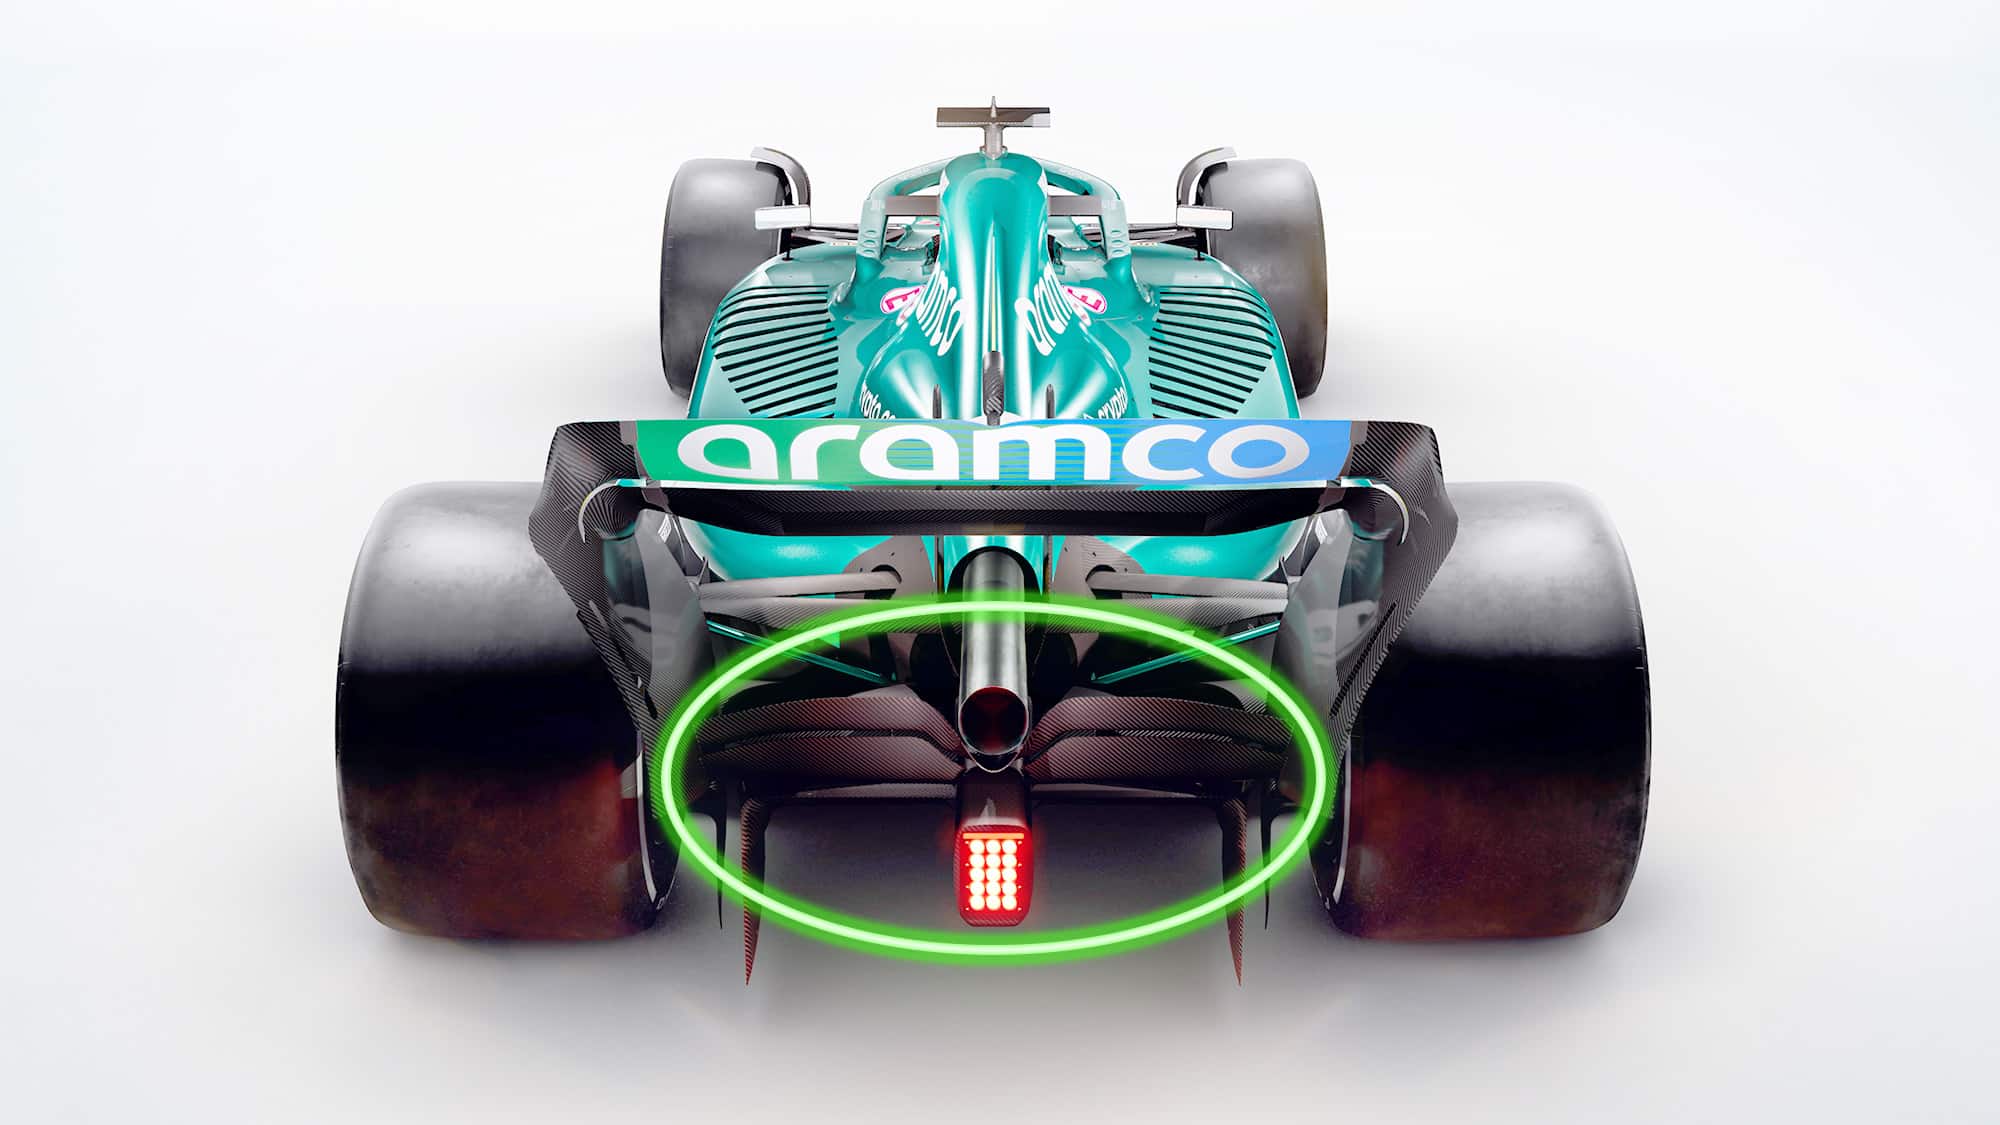
The diffuser appears to be utilising a double kick strategy, keeping the forward portion of the tunnels low to maximise the ground effect in this region, then kicking up early to improve forward extraction – increasing the speed of the airflow at the inlets, then kicking again further in the main body of the diffuser.
There’s a little curl at the back of the floor edge, I’d expect a few teams to pick up this geometry to gain local suction and introduce loss into the rear tyre’s contact patch.

There’s a big notch at the start of the diffuser sidewall: this gap will draw in more air, to the join the fast flow exiting from under the car and stabilise the vortices along the lower portion of the diffuser sidewall.
The bodywork strategy is very different to previous years, maximising the opportunities afforded by the new regulations. Cooling is heavily biased to the top louvres, as the rules allow them to be significantly larger than previously, with a tiny bodywork outlet at the rear.
This could suggest two things:
• Good quality flow to the beam wing underneath the rear wing is prime for diffuser performance on their car, so you want to bias the low energy cooling air up and away from there
• There is potentially some wake latching on the top of the bodywork, venting cooling air there could drive it off
Venting in this manner will likely help the beam wing, but reduce performance of the rear wing. The losses are a little more uncontrolled too, and may suffer a bit more movement and drift in cornering conditions than a rear exit.
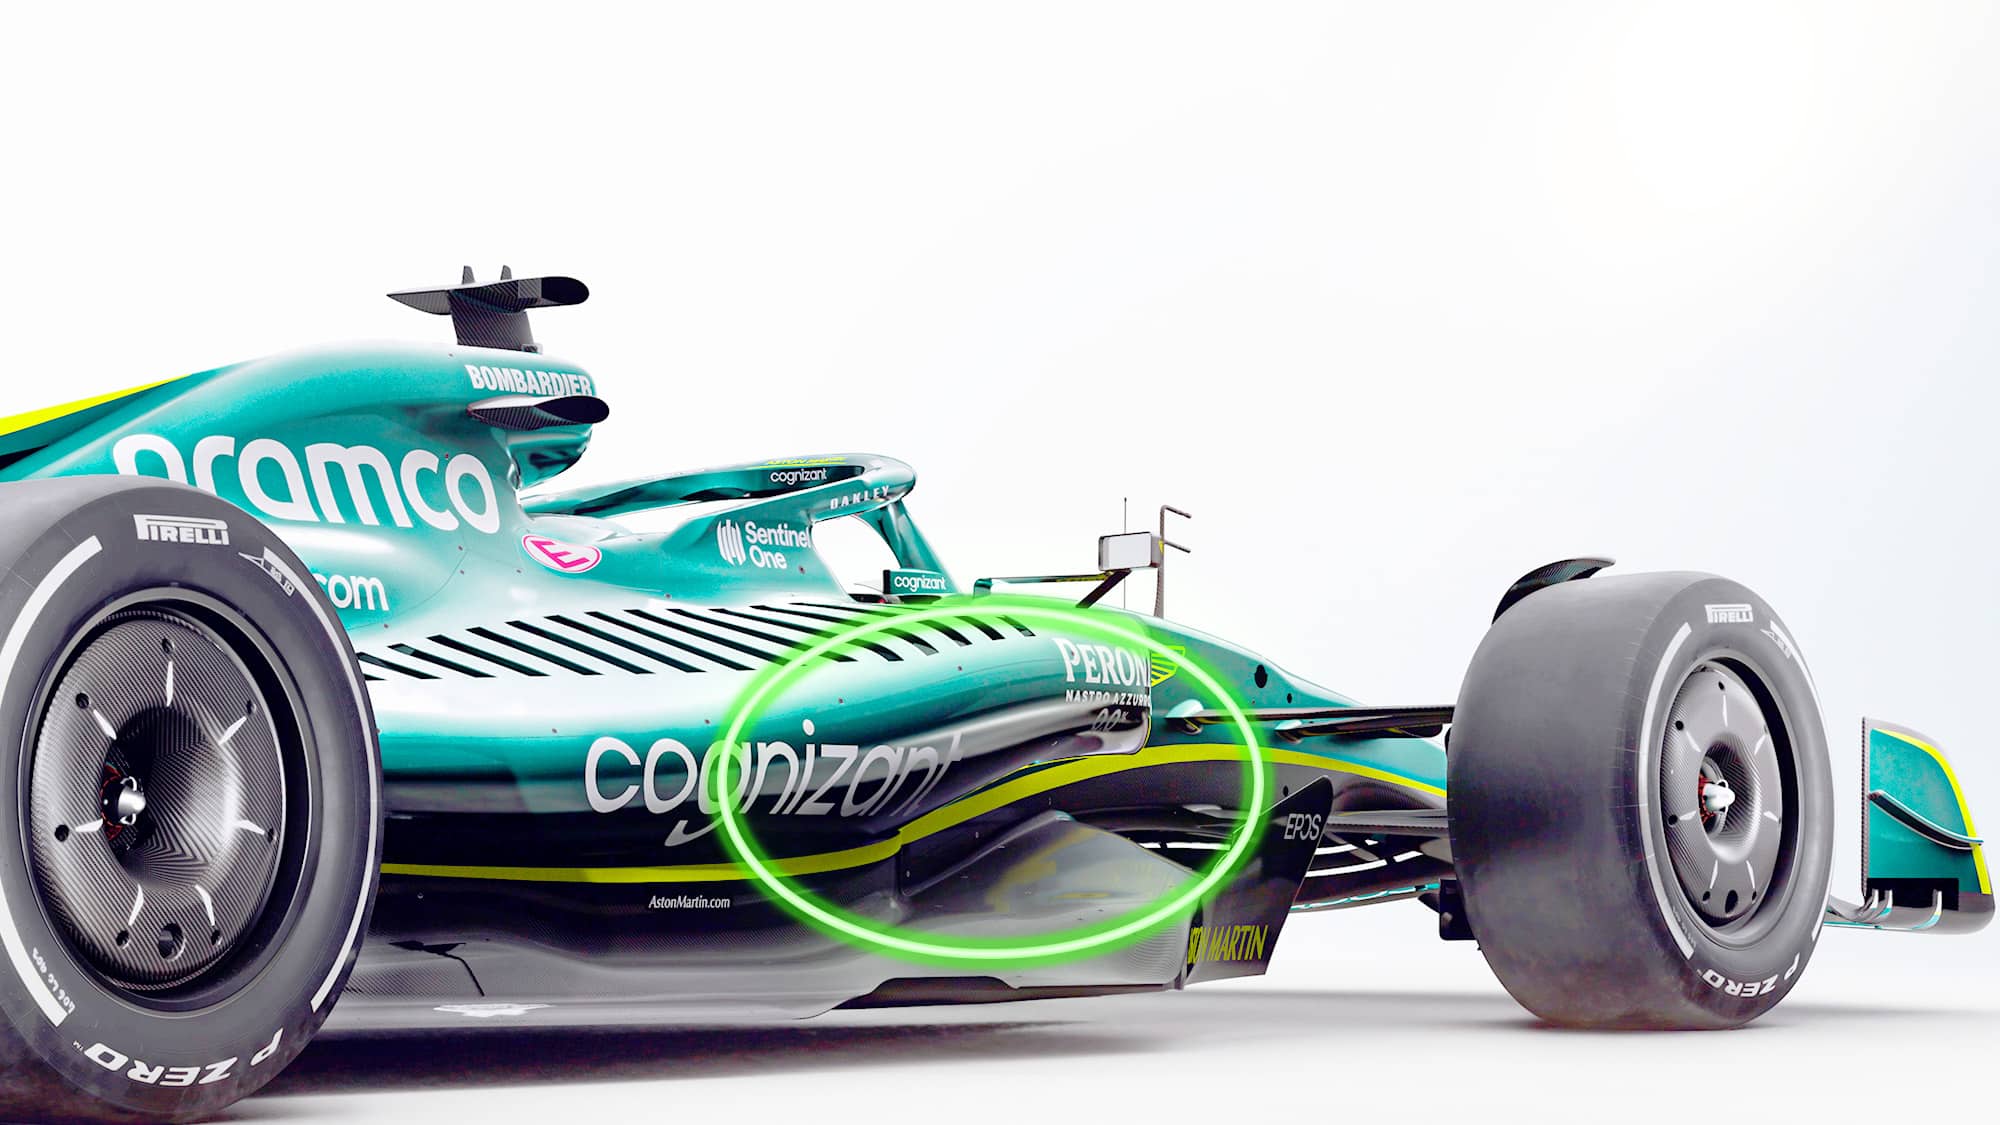
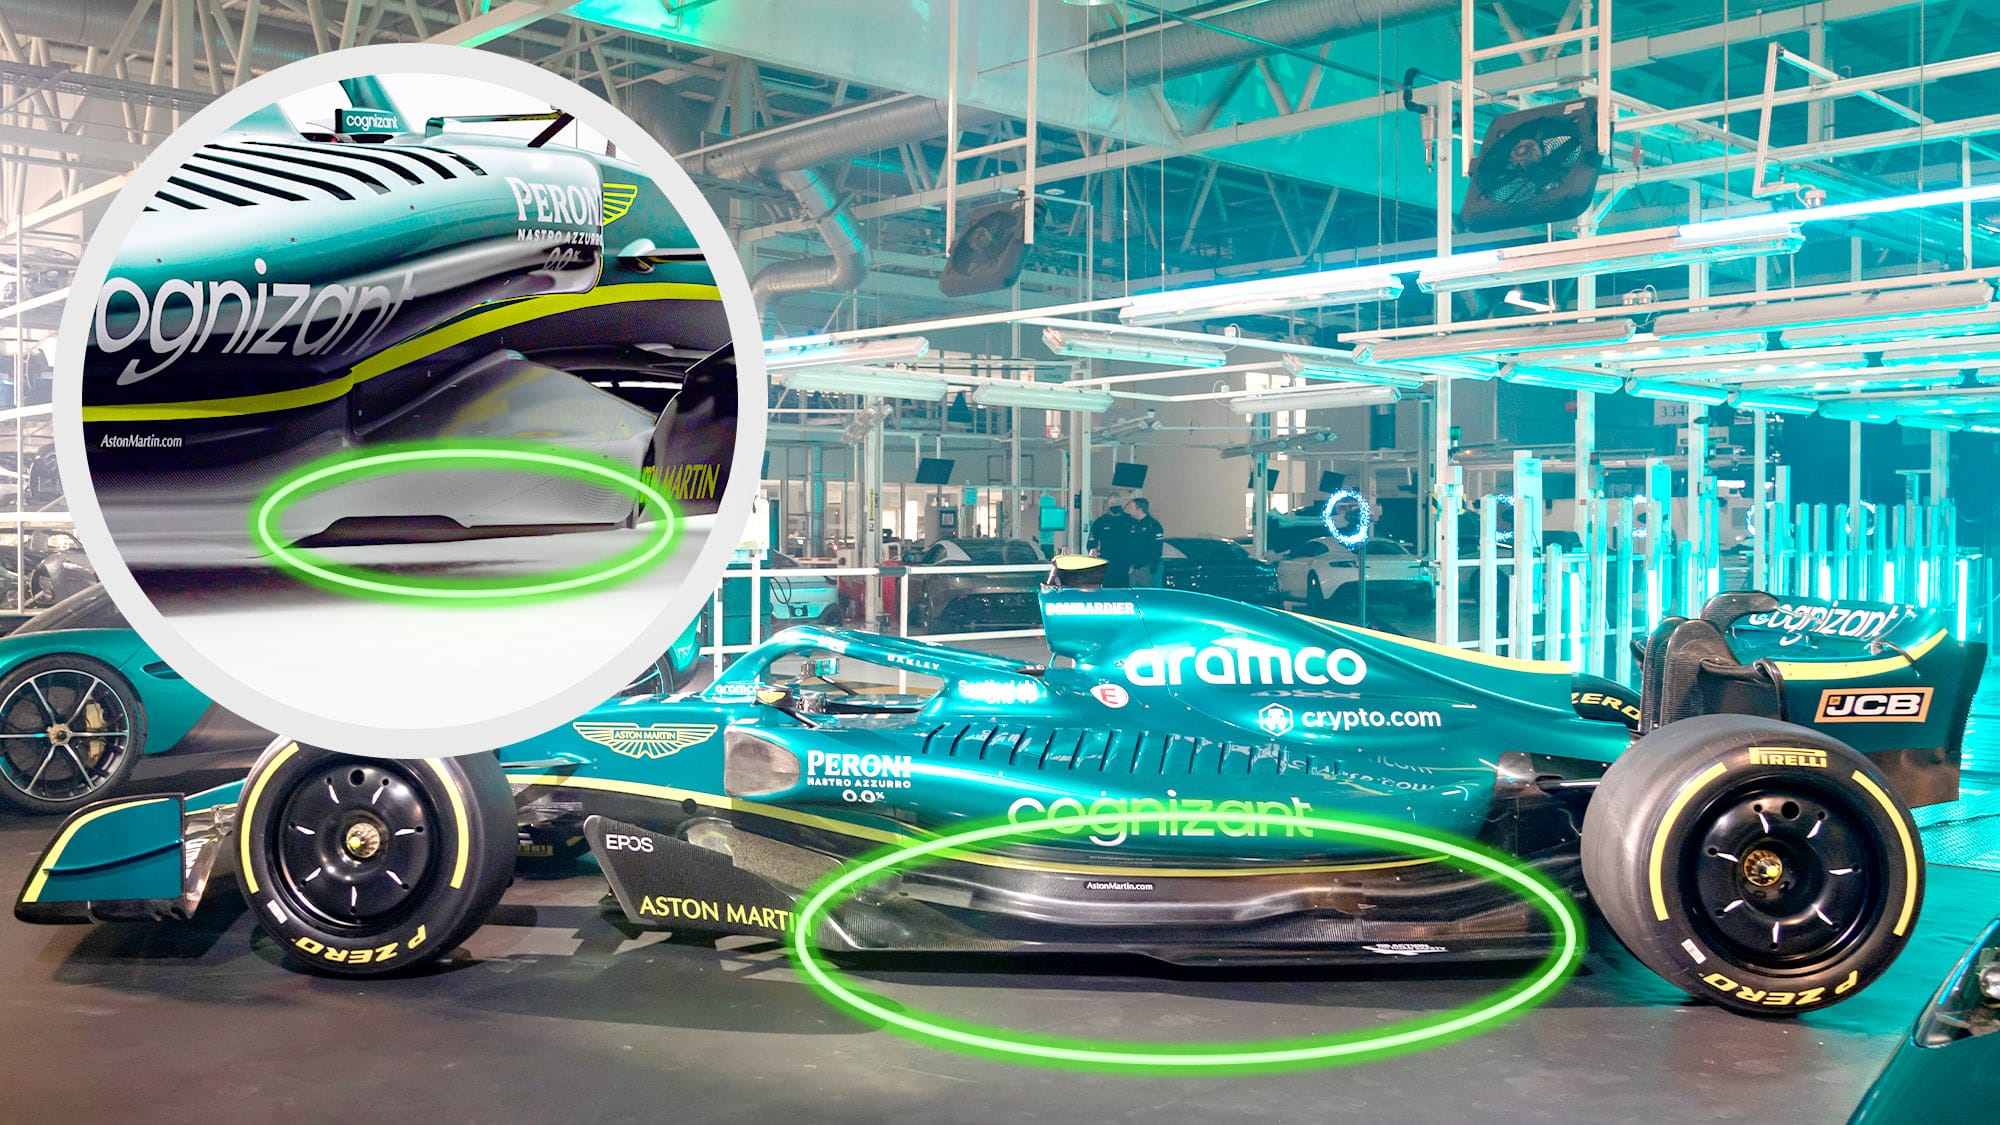
That sidepod top cooling has allowed for a hugely impressive undercut too (follow the bright green line with your eyes). This should help with getting a lot of clean air over the top of the floor, back to the diffuser rearwards and rear cake tin.
The lower pressure in front of the sidepod and undercut at the front may mean that the front wake is not as well controlled, but this is why they have relied on other solutions (more aggressive bargeboard/outer strake, sidepod further forwards into legality). The air pushed down by the undercut should also support and help clean up any airflow losses leading edges of the floor that curve downwards.
The side curl on the floor is larger than the Haas, going for a very long length, which should help to extract air from the forward floor.
Notably absent is the flap that you are allowed by the rules. I find it unlikely that they would not want to use that in some shape or form, so I would expect it to make an appearance later on, perhaps they have come up with an interesting solution for it.
The second portion of the flap appears to have a small gurney (it’s there in the real photos too, you just have to squint really hard). This shows they are biasing extraction a bit more to the rear of the curl, not dissimilar to where Haas elected to position its entire curl.
The beam wing is a dual element, with continuity the whole way through the exhaust section on the second element. It appears to be angled steeply, possibly to the limit of legality in the centre with a slight drop off towards the tips.
This is a contrast to Haas’s single beam and it will be interesting to see which approach other teams opt for.